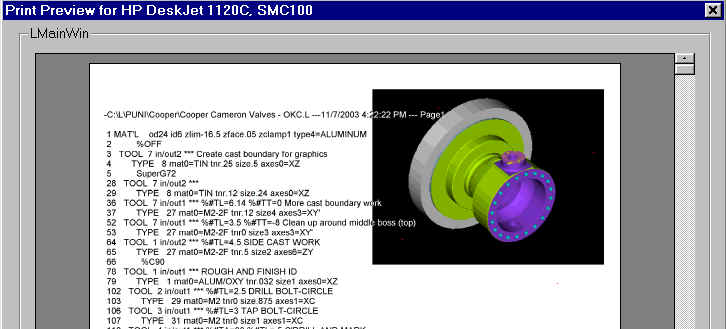
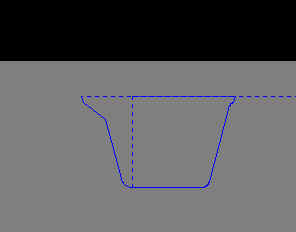
Never send a simple printout to the shop floor again. Add an image as large or as small as you like. Make it solid or wireframe. For laser printers, give it a black background. For color printers, give it a white background.
How it works: When you click on File|Print|Print Source or File|Print|Print ToolList, you'll see the graphics screen quickly refresh as it re-builds an image for your printer. Your printout will show the part on each page (or just the first, or just the last, or just the first and the last).
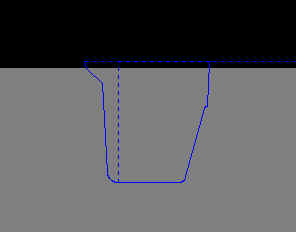
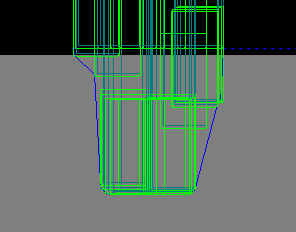
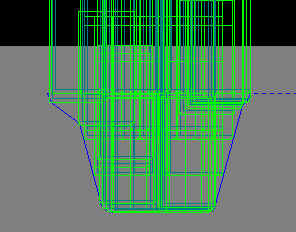
How to change it: If the picture is too large or too small, just resize your screen's graphic viewport. You can even stretch it long in X (or Y) to make better use on the paper. If your picture has too much detail, then press Ctrl-Left Arrow to collapse your source and draw just a few expanded tools. To show a wireframe instead of a solid, press F2 or F5 before selecting File|Print. If you right-click on the viewport, you can change the solid picture from iso2 to any other ISO view or to top, front, side, etc. If you'd like to alter printer settings, just click on Tools|Options|Print:
Added Admin mode (password protection) to Tools|Options, so that critical settings are tamper-proof.
Using your left-mouse button, click and drag SOMEWHERE IN THE MIDDLE OF THE SOURCE LINE (not the left side of the line) to highlight several lines of source. You will need to drag your mouse in an up-down motion to highlight more than one line. Next select from the pull-down menu, Edit|Copy (or Ctrl-C). Now right click anywhere else in your source program. You will be asked whether to paste above or below the selected line of source. Special note: to cut or copy just one line of source, click and drag in a left-right direction rather than an up-down direction. If you highlight at least 30% of the source line, then it will be fully selected when you let go of the mouse button.
Did you know you can open several G-ZERO sources at the same time? Try starting two copies of G-ZERO and then load two different source programs (or from Windows Explorer, double-click on two different sources). Then using your left-mouse button, click and drag to highlight several lines of source. Next select from the pull-down menu, Edit|Copy (or Ctrl-C). Now right click anywhere else in the OTHER source program. Or you can just select the second source and press Ctrl-V to paste the lines to the end.
Once you have pasted some source into the clipboard using Copy (or Cut), you can paste back into the middle of the source, OR A DIFFERENT source by right clicking anywhere in the middle of your program. G-ZERO then asks whether to paste above or below the selected line.
If your hand-eye coordination is good, and you hate having to confirm deletions all the time, just click your left-mouse button in the middle of some source and highlight like crazy until all the offending source lines are lit. Then just press Ctrl-X to make large chunks of your source go away real fast. Remember, if you delete the very last line of source, then the whole block is usually irretrievable.
Decimals now fully supported in file and folder paths: Go ahead and name your file something like M:\Preferred_User_Mill_Data\Mills\Machine.2\Stage Bezel Mount_Rev22.5.023_Op11.M
Source is easier to read from inside the post: Added support in
post to 'see' any number in the recent source.
For example to see the 3rd number entered for the most recent mill command, just use #7.3.
Variable #7.0 contains the total number of entries given for the most recent mill command.
G-code header now includes DATE and TIME stamp.
Improved DXF output so is cleaner and ignores %S, etc.
More control of collapsed source lines: Go to Tools|Options|View to check (UNcheck) 'Collapse comments' or 'Collapse Tool TYPEs' so that when users press Ctrl-LeftArrow those kinds of lines will hide (show).
CadFilter.exe added to help strip unwanted and unsupported data from DXF files. This external program can be run from Start|Programs|G-ZERO CAM|Lathe, or you may right-click on a DXF file and select 'Send To'. After loading the DXF file, you can uncheck boxes to de-select layers, colors, geometry or line types. Then just click on File|Export Filtered File (or press F8) to create a new DXF file (with tilde (~) at the end of the name) that is ready for G-ZERO's CAD Reader.
Eliminated limit of 32,000 for N numbers
Older source programs (pre-v3.1) are now automatically upgraded as they are loaded.
To extend filename at very top of G-ZERO Window (caption), go to Tools|Options|View|Misc Options|Full Path Caption. Then close and reopen G-ZERO.
SMOOTH and ROUGH no longer have a 500 point input limit
Complex grooving just got a whole lot easier. Now you can program a small chamfer on the left side of the groove while cutting a large radius on the right! The angle and inside radius can also be different. Best of all, the diameter can grow or shrink to make thread relief work downright simple. Just place a comment on the line directly ahead of your GROOVE, for example:
SuperGroove x1=1.75 a1=3 r1=-.05 r2=.035
GROOVE x1.5z-1.25dp.25w.25skip0r.01ir.025a15 f.005
will cause the LEFT SIDE OF GROOVE ONLY to be at a different X (1.75) and have a different
wall angle (3) and a .05 chamfer at top and a .035 radius on the left inside corner.
Another example:
SuperGroove r1=-.05 r2=.035 step.05 passes3
GROOVE x1.5z-1.25dp.25w.25skip0r.01ir.025a15 f.005
will change the two LEFT-SIDE rads, but not X or angle. Step.05 eliminates the need for
the PECK command, since it sets rough plunge stepover. Passes3 causes the tool to rough
all the way across the groove 3 times (at 3 equal depths), rather than plunging all the
way to full depth. Other supported flags (which need no numbers following):
Touch causes tool to feed all the way across bottom until it 'touches' the left wall and then feeds all the way out to avoid any dwells.
NoG0 suppresses all G0 moves and uses G1 F.1 instead (may need post tweak)
Note: equals sign is optional, but increases legibility...especially after
x1,a1,r1,r2.